

My husband and I love jam and toast, but those tiny little "natural ingredient" jars at the store come with such a huge price tag! I decided to take advantage of the low price on summer fruit at Sam's and try my hand at a DIY project.
Luke tries not to cringe when I announce a "new challenge" for the day. I don't have a fantastic history with DIY projects due to my somewhat impatient nature =) , but I was riding high on that previous day's success with my Grandaddy's fig preserves. (I did stop to do some research and combine some recipes before setting out for the kitchen.) Ah, Google, how I love thee!
2 Pint Jars of Strawberry Jam
12 Calories
0 Fat
3 Carb
Tools:
A tall pot -think deep and large like a spaghetti pot
Mason Jars with lids and rings
Hot bath basket (this is a suggestion, it really does save your fingertips .. oh yes, I know all about that)
Long spoon
Handy, dandy kitchen towel
Ingredients:
32 oz. fresh strawberries - chop off tops and do a rough cut
2 C white sugar
1-2 T lemon juice
1/2 C water
1 1.75 ounce packet of "no sugar needed" pectin*
Prepare the jars: Boil water on the stove or in the microwave and carefully pour the water into the waiting jars. (all the way to the top) Bring another 4-5 cups of water to boil and drop your lids in while you prepare the jam.
Jam: Combine fruit, lemon juice, sugar (to taste) and water in boiler and let fruit rest for 10 minutes so the juice can draw out. Bring to a vigorous boil -slowly stirring the entire time to prevent the sugared fruit from scorching- and crush fruit with a potato masher until desired consistency. Stir in pectin until it dissolves. Bring fruit back to a full rolling boil ( a boil that cannot be "stirred down"). Let boil for 1 minute. Remove from heat.
Carefully empty the now warm water from the jars and have the lids nearby. (you may want to set the jars on a towel to protect your counter from the sticky) Even more carefully spoon the jam mixture into the jars. I find that a 1/4 cup measuring tool with a long handle works nicely without gooping up the outside of the jars too much, but you could also use a large mouth spoon if that is what you have on hand. You want to fill the jars all the way to the top of the neck.

Hot water bath: I give the same boiler a quick rinse and scrub with a brush, fill it back up with water, and bring to a boil. Make sure the jar lids are on tightly and place them in the boiling bath, the water should cover the entire jar or at least come up to the lid. Let them stand for 5 minutes, turn the heat off, and carefully remove them from the water and onto a drying towel. Let jars set up for 24 hours before you label and store.

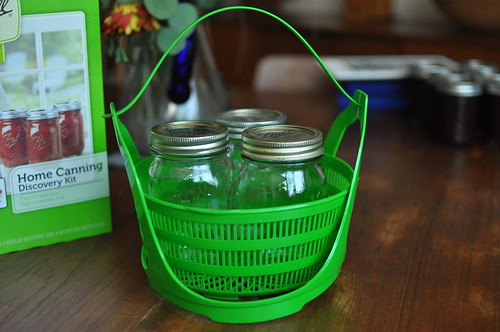
There are all types of hot water bath baskets. I bought the one above, because it was on sale. I have been really happy with it so far and see no reason to buy a more expensive metal one. But I caution you, trying to save money by not buying one, can be painful both for your fingers and emotionally when you drop the hot jar and you watch in slow motion as your yummy jam goes all over your kitchen floor.